
Everything You Need To Know About Crayola Air Dry Clay

Clay is a wonderful medium for children as it helps them develop their fine motor skills as they squeeze, roll and pinch the clay. Building something that's three-dimensional develops problem-solving skills. They must learn how to attach one piece to another, and consider how to make their clay piece stable, so they won't fall down. Some children, even those that are not attracted to drawing and painting may respond enthusiastically to building with clay and other materials.
Types of Clay for Kids
There are many types of clays people use at home, in art studios and in schools. The three that most children use are: polymer clay, foam clay/model magic and air dry clay. Maybe you are lucky enough to have a pottery studio near where you live or your school may have a kiln. Clay that can be fired in the kiln is what I refer to as "real" clay. Even if you don't have access to a kiln you can still learn the same building and attachment skills using store-bought clay.
Polymer clay is man made and contains polymers, resins, coloring agents and fillers. It needs to be conditioned by rolling it in your hands until it become malleable. Your polymer clay creations need be baked at a low temperature to harden. When it bakes it gives off fumes so the room needs to be well ventilated. There are a huge variety of colors and you can buy metallic clays as well. Polymer clay can be turned into jewelry, beads and small trinket bowls.
Foam clay or Model Magic, also made by Crayola, is a soft and lightweight clay that comes in white and a range of colors. It's great for younger children to use as an introduction to working with clays. It doesn't hold impressions or details as well as polymer and air dry clay.
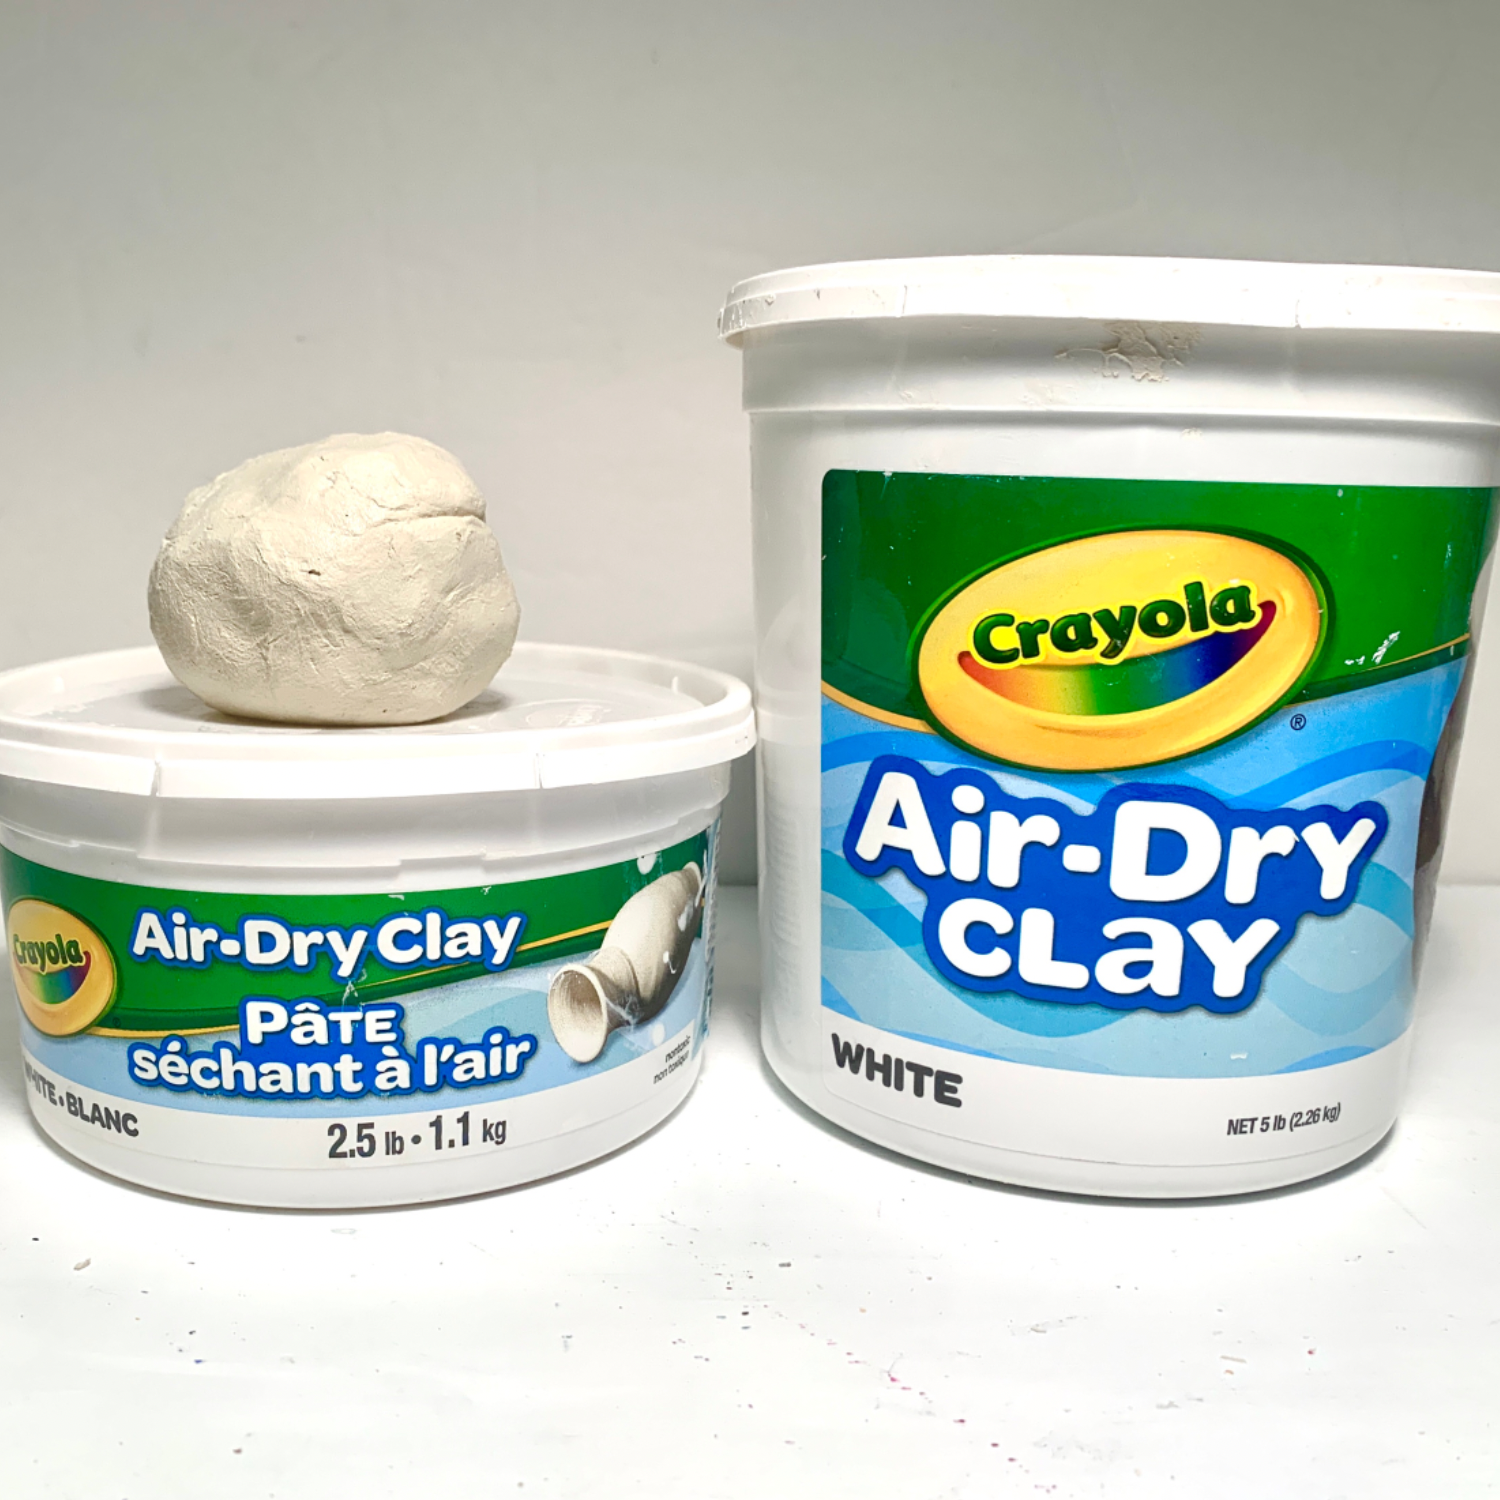
Our favorite, and the one we use for all the demos for Art Club and during our Facebook lives, is Crayola Air Dry Clay. Its texture is similar to "real" clay. When you work with Crayola air dry clay you learn the same techniques needed for working with real clay that is fired in a kiln. It's inexpensive too. You can get a 2 pound container for $6.99 from which you can make many small projects and several medium-sized projects.
Tools for Air Dry Clay
All you need are a toothpick, a popsicle stick and a paintbrush. Another thing that comes in handy is a small ball of aluminum foil. You can roll this over the surface of the clay to create texture in.

Attaching Clay Pieces
As with real clay you need to score and slip air dry clay pieces to attach them securely. If you skip this step, the parts that you attached will fall off when the clay dries.
To score means to create hatch marks in the soft clay surface. This can be done with a toothpick or metal pin tool. Slip is a slurry made from clay and water. For Crayola air dry clay I've found that plain water works fine. A small amount of slip or water is added to the hatch marked surface.
For example, if you want to attach a handle to a mug you'd score the areas of the handle that will sit on the side of the mug and also score the places, on the mug, where the handle will attach. You only need to apply water or slip to one of those surfaces. When you attach the pieces I gently press them together. You can also blend between the handle and the mug with a modeling tool or popsicle stick to create a smooth transition.
One thing we've discovered, that helps when working in small areas, is using a slightly damp paintbrush to smooth the surface. This works well when joiningparts where a finger is too large to fit into small places.

1. Crosshatch clay to score
2. Add a very small amount of water or slip to scored area
3. Attach piece and blend with popsicle stick
4. Smooth the area with a slightly damp paint brush
Finishing Air Dry Clay
Just like real clay that needs to be glazed, air dry clay needs to be finished but with acrylic paint. Finishing with paint gives you a lot of control over what the finished piece looks like. Alongside brushing on acrylic paint we also use permanent markers and paint markers to add small details. Crayola air dry clay comes in white and terra-cotta. We prefer the white as it creates a clean canvas to paint on that allows the colors to shine..

Finished clay pieces with Posca paint pen, Sharpie paint marker and Sharpie permanent marker.
We recently discovered that it's possible to paint Crayola Air Dry Clay before it is completely dry! Other air dry clays shrink as they dry which makes the paint flake off. Crayola air dry clay does not shrink, as it dries, which makes it stable as a surface for acrylic paint.
We recommend you wait a couple hours before you paint, so that your piece has time to set up and dry. After you finish forming the clay let it sit out for two hours or until it's completely dry. If you paint the clay when it's wet you do need to be careful that you don't accidentally bend an addition or change the surface by pressing too hard with your brush.
Air dry clay is more fragile than kiln fired clay. Painting with acrylic paint helps protect the surface. For added protection, you can add a coat of mod podge over the acrylic paint.
If you don't have Crayola air dry clay, you can still follow along with us in our demos for Art Club and during our Facebook live art tutorials. If you're using polymer clay you'll need to bake it to harden the clay and if you're using foam clay your results may be look different, but you'll still have fun creating with clay!
Beat boredom with weekly art projects. Got an artsy kid? Keep them busy as a bee with art lessons inspired by contemporary artists. Lessons in drawing, painting, origami, and of course clay!
Join Pop up Art School's Art Club for kids. Get on the waitlist and we’ll send you 5 art activity PDFs for free!
Join us twice a week on Facebook, when we go live with tips and art tutorials for kids. Wednesdays at 3 PM and Friday at 7 PM EST.
Join our email newsletter community:
Click here to find out where we’re popping up next, get helpful art-making tips and free mini video tutorials!
Pop up Art School – your one stop for art lessons
Ditch the car keys, choose a lesson, fire up your device, and create with Pop up Art School – from the comfort of home!
Even if you can't draw a straight line, our step-by-step art tutorials help you relax and feel confident.
Our Art-to-go library has prerecorded art projects for kids, teens and adults in a safe ad-free environment. We now offer kits with free shipping in the USA.